
Learn Excel VBA Unit Testing
1. Overview
Welcome to the world of Excel VBA unit testing! In this tutorial, I am going to introduce you to Rubberduck VBA, and its unit testing capabilities.
What you’ll learn
- How to add test modules
- How to add unit tests
- How to run unit tests
- How to interpret test results
What you’ll need
- A Windows computer with Excel 2007, or newer
- Basic knowledge of Function and Sub procedures
All the commands that are listed below are executed on a Windows 10 machine with Excel 2016.
2. Get started
This step is only needed if you have not set up your development environment. You need to install Rubberduck VBA to your Excel. You can follow these instructions to install it.
Download Rubberduck installer from this link. Once download is finished, start the installer and follow the steps in the setup wizard.
Kicking off Excel
After setup has finished installing, it’s a good idea to launch Excel, open VBA Editor, and verify Rubberduck has been properly installed:
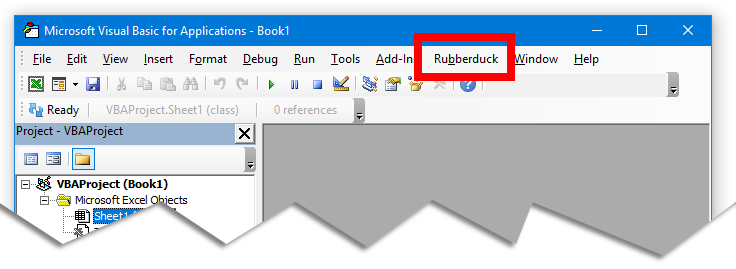
After installing the Rubberduck add-in, a new menu appears in VBA Editor.
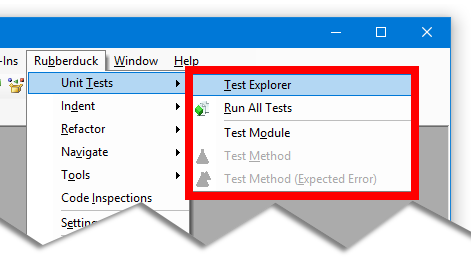
The options we’ll use in this tutorial are located unter the Rubberduck > Unit Tests menu:
3. Create a function to test
In the previous step, we started Excel and opened Visual Basic Editor. In this step, you are going to insert a new code module, and add a new Function to it.
I’ve already prepared a function that we will unit test later, so just paste it into Module1:
https://gist.github.com/bervukas/be5520c22fd8aa18d0344f05aadb92e7
Here, you defined a new function, called ValidatePasswordLength(). It takes a single parameter of value string, and returns a boolean.
The purpose of the function is to assure that the password length is valid. It needs to be greater or equal to 8, and less or equal to 16 characters.
In next steps, we are going to create several unit tests that will test this function.
4. Insert a Test Module
Before you can start adding unit tests, you need to first insert a test module. A test module is a container for unit tests. Each test module can have zero or more unit tests. You can have any number of test modules in a project, depending on the complexity of your requirements. In this tutorial, you are just going to use a single Test Module.
To insert a new Test Module, you need to display the Test Explorer window. You do that with the Rubberduck > Unit Tests > Test Explorer menu command:
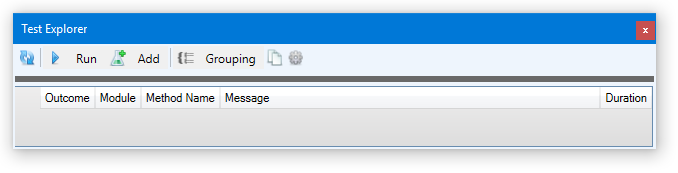
Next, select the Test Explorer > Add > Test Module command. This inserts a new Test Module called TestModule1:
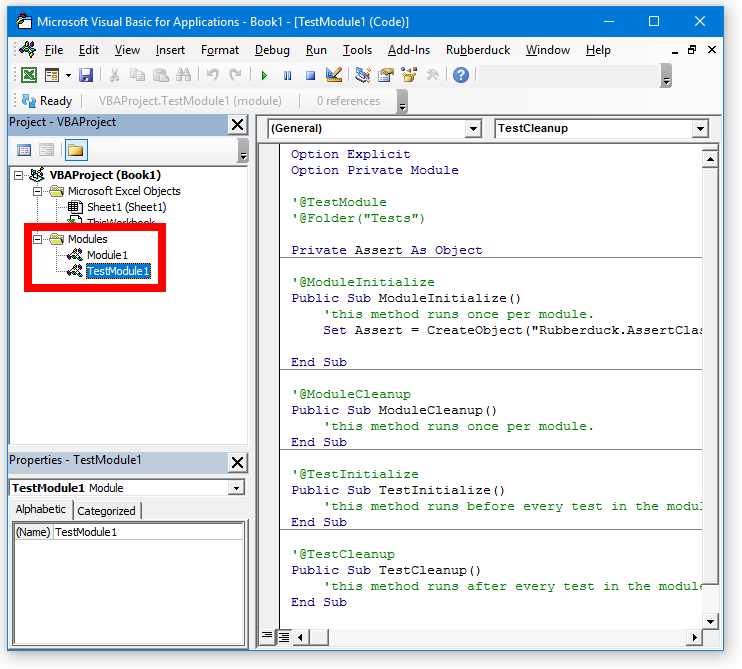
Every time you insert a new test module, it contains these procedures: ModuleInitialize(), ModuleCleanup(), TestInitialize() and TestCleanup(). They are used to perform any initialization before running the tests, as well as cleaning up after tests have finished running.
Step 5: Add unit tests
If you try running the tests now, you won’t get any output. That’s because there are no unit test methods yet. So let’s start to add some tests. Usually it’s best to add the tests at the very bottom of this module, below ModuleInitialize(), ModuleCleanup(), TestInitialize() and TestCleanup() functions.
To insert a unit tests:
- First, make sure you’re located in TestModule1, just like in the previous screen shot.
- In Test Explorer, click
Add>Test Method.
Test Explorer inserts a new test method:
https://gist.github.com/bervukas/22da0ca94b8d49f43a7319a03f2c1256
What’s happening here?
Looking at the generated code, we see the Arrange, Act and Assert comments. These help guide us in writing better tests. For the purpose of this tutorial, we can delete all three of these comments.
Notice the @TestMethod attribute right in front of the function declaration? This attribute is automatically added to every test method. It’s there so that the method can get picked up by the test runner, as well as Test Explorer. Without it, test methods wouldn’t show up in Test Explorer.
To illustrate this concept, let’s click on the Refresh button in Test Explorer, and observe how the newly added test method now shows up in the Test Explorer window.
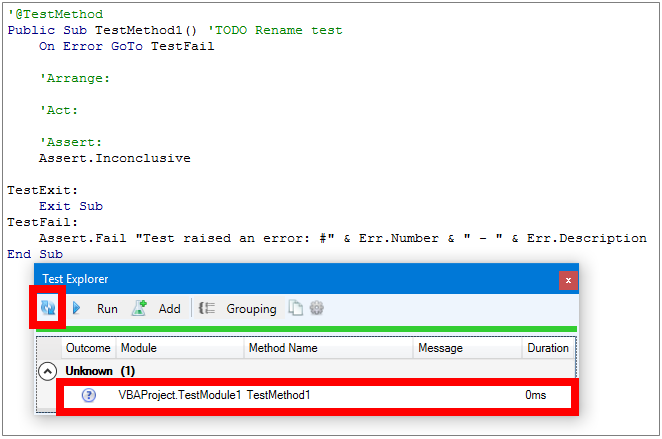
After refreshing, the test method shows up in Test Explorer
It’s a good idea to use the refresh button when you make changes to your methods, such as renaming them, deleting, or adding new ones.
Note: When you get more comfortable with writing unit tests, you can omit using the wizard — and code your test methods directly in the editor. You can do this by adding the @TestMethod attribute right in front of your test method.
Step 6: Customize the Unit Test
So far, this test method doesn’t do anything — it doesn’t test any code. So let’s customize it, by giving it a more appropriate name, and let’s add some code to it.
Let’s rename the test method from TestMethod1() to TestPasswordLenthIsTooSmall(), and delete the three “Arrange:”, “Act:” and “Assert:” comments.
Next, let’s modify the TestPasswordLenthIsTooSmall() test method, by having it invoke the ValidatePasswordLength() function we created in Step 3, by passing it the parameter “bob”.
You can do this by replacing the line:
Assert.Inconclusive
with:
Assert.IsFalse (ValidatePasswordLength("bob"))
The purpose of the ValidatePasswordLength() function, is to verify whether the password is valid, by comparing it’s length. If it’s within the range of 8-16 characters, the password is valid, and the function will return true. If it’s outside of that range, it will return false. Because we’re passing the parameter “bob”, we’re expecting to see a false result. That’s why we use Assert.IsFalse().
When you’re done, your code should look like this:
https://gist.github.com/bervukas/99d59653f79b5776bb910dffaba9d7fc
Assert.IsTrue and Assert.IsFalse above are methods from Rubberduck’s Assert class. Conveniently, it also provides a few other methods that we can use:
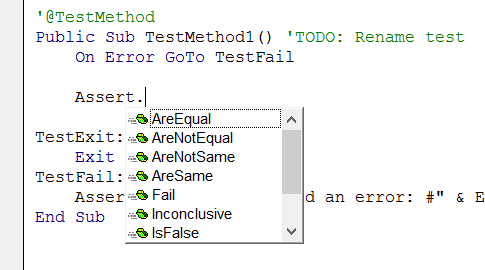
The Assert class in Rubberduck VBA provides some of the most commonly used assertions.
Believe it or not, that’s it! We’re done with creating our first test case.
Step 7: Run the test
Now starts the real fun: let’s run it. In order to run the test:
- Inside Test Explorer, click
Run>All Tests.
In Test Explorer, we can see a few things:
- Test result: failed, passed, and not run tests
- The name of the test module
- Name of the test method
- How long it took to execute the test, in ms
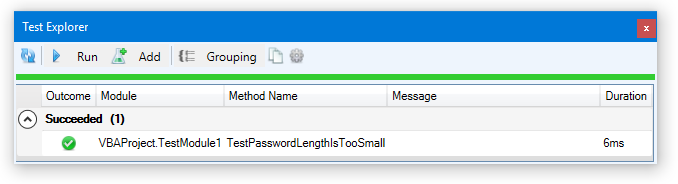
After running the unit test, the Test Explorer updates with the latest result.
That’s it! As you can see, our unit test passes. If you’d like to add the remaining test cases, you may do so. When you’re finished adding them, you just need to refresh the Test Explorer, and re-run the tests. The Test Explorer will run all of them, and show you the summary of results for each.
Once all your tests pass, you’re good to go!
Step 8: Add more test cases (optional)
So far, we’ve added one single test method, and ran it to make sure it passed.
We can use many different values to ValidatePasswordLength()‘s parameters. For example:
- “bob” –> should return FALSE
- “ASecretPassword” –> should return TRUE
- “” –> should return FALSE
- “123456” –> should return FALSE
- “IAmAVeryLongLongLongLongPassword#!{}$#.” –> should return FALSE
If we imagine running ValidatePasswordLength() with the inputs above, we should get results as indicated in the bullet points above.
Just for fun, I’ve added a few of the test cases above, and this is what I get after refreshing and running the tests:
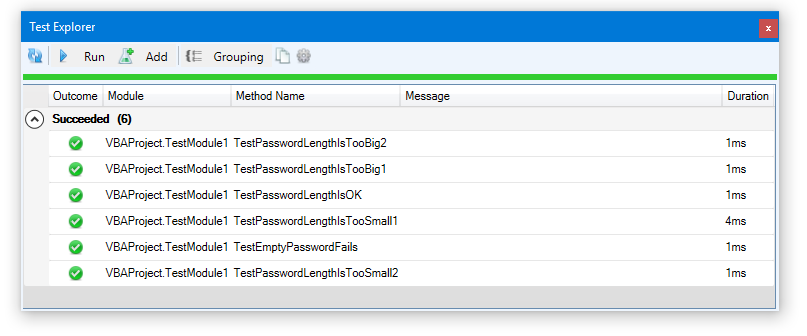
Running multiple tests using Test Explorer
All the tests pass. Pretty neat!
Summary
In this tutorial, I’ve shown you how to get started with Rubberduck VBA to create and run your very first unit test. Congratulate yourself on your success!
Obviously, a real-world scenario doesn’t include just one single test. There can be many unit tests organized in many test modules, depending on the complexity of your solution. The great thing about using Rubberduck VBA is that it provides a Test Explorer which allows you to navigate your test cases.
If your company is considering implementing unit tests, or require tailor-made solutions for complex scenarios, please don’t hesitate to get in touch.